The Definitive Guide to Finishing Your Polymer80 Frame
The Definitive Guide to Finishing Your Polymer80 Frame
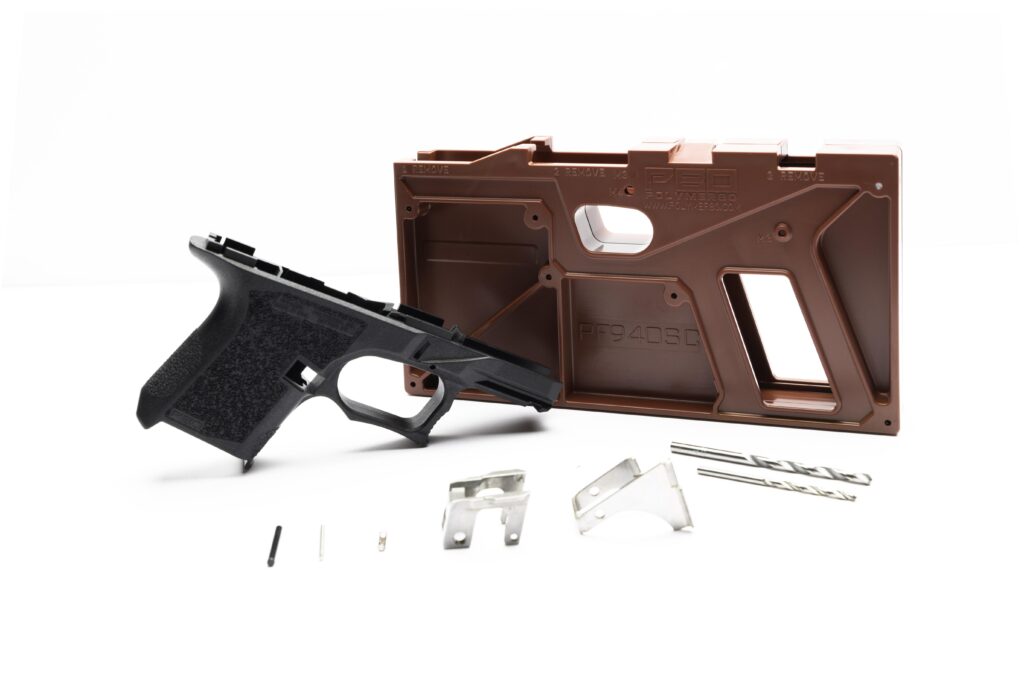
You've got a Polymer80 PF940v2 frame in your hands, and the rear rail module is still a solid block of polymer. That's the single most critical step separating you from a functional firearm, and doing it right is non-negotiable. This isn't a craft project; it's a precision machining operation that demands the right tools, a methodical process, and an understanding of how the final components interact. Skip the guesswork. Here’s how to finish a Polymer80 frame correctly, the first time.
Essential Tools: Don't Start Without These
Attempting this with a hand drill and a rusty file is a fast track to a ruined frame. You need controlled, precise removal of polymer. A reliable drill press or a high-torque hand drill secured in a vise is the bare minimum. For the milling, a Dremel rotary tool with a reinforced cutting wheel (like the EZ409) and a router attachment is the industry-standard setup. You'll also need a set of drill bits—3mm and 4mm are crucial for the pin holes. A set of quality armorers punches, a small hammer, and a vise to securely hold the frame are mandatory. A flat bastard file and 220-grit sandpaper will handle final cleanup. If you're sourcing a kit, the Tools & Jigs category at Polymer80Shop has the specific bits and holders that match the frame's requirements.
Step-by-Step: Drilling the Pin Holes
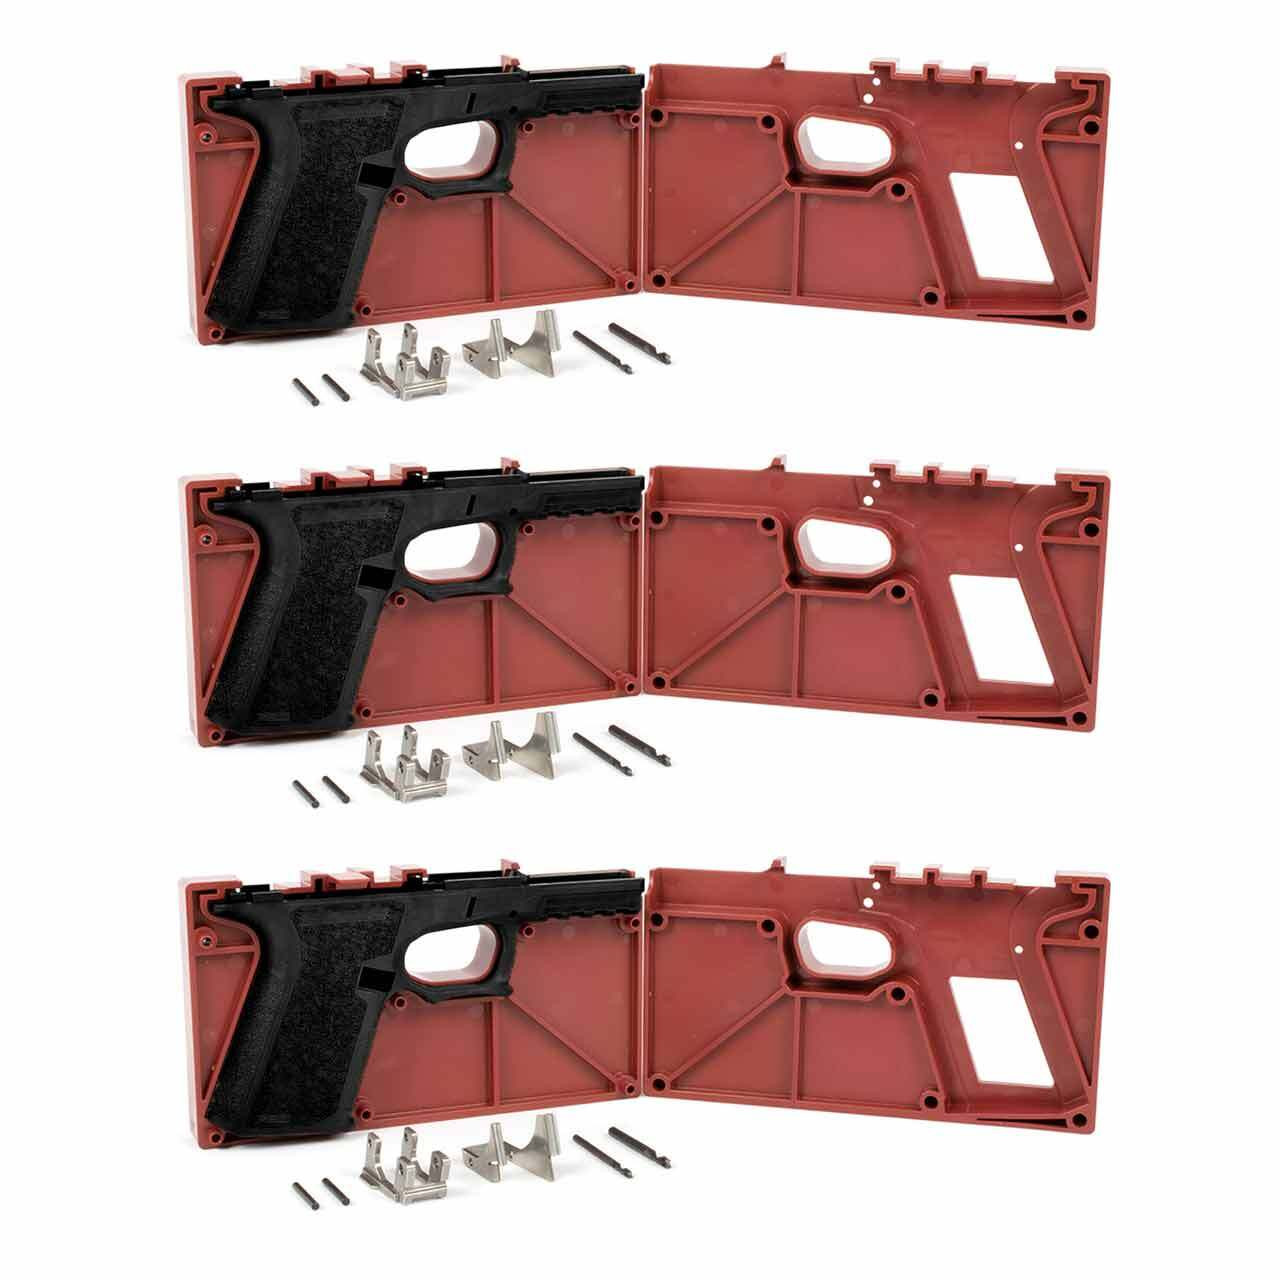
Accuracy here is everything. The jig that came with your frame is not a suggestion; it's a precision guide. Clamp the jig halves securely around the frame with the provided screws. Before drilling any polymer, use a center punch to create a small dimple on each drill point—this prevents the bit from wandering. Start with the 3mm bit for the trigger pin and locking block pin holes. Drill straight down through the top of the jig, applying steady pressure. Clear polymer shavings frequently. Repeat with the 4mm bit for the front rail module and rear rail module holes. Do not force the bit or drill at an angle. After drilling, remove the frame from the jig and use the file and sandpaper to clean any flashing or burrs from the holes. Test-fit the corresponding pins; they should slide through with firm but smooth pressure from a punch.
Milling the Rear Rail Cavity: The Heart of the Operation
This is where most beginners hesitate. The goal is to remove the polymer tabs in the rear of the frame to create a clean, flat shelf for the rear rail module to sit flush. Install your Dremel with the cutting wheel and attach the router base. Set the depth so the cutting wheel protrudes just enough to shave the polymer tabs down level with the surrounding channel—usually about 1/8 inch. Work in multiple light, shallow passes. Do not try to remove all the material in one go. Move the router base along the channel walls, letting the tool do the work. The finished cavity should be smooth, with the metal rear rail module dropping in perfectly flush, not proud or recessed. Any high spots will prevent proper slide cycling.
Installing the Rails and Testing Fit
With the holes drilled and cavity milled, you can install the critical metal components. Start with the front rail module (locking block). Insert it into the front of the frame, aligning its holes with the 4mm holes you drilled. Drive the front rail pin through from left to right. Next, place the rear rail module into the milled cavity. It should sit flat without rocking. Insert the rear rail pin. Now, test the slide. Without the recoil spring assembly, the slide should rack onto the frame smoothly, with no binding or gritty feeling. It should travel the full distance and lock back manually. If there's any hitch, remove the slide and check for polymer debris or high spots in the rail channels. A drop of lubricant on the rails is fine for this test.
Final Finishing and Function Check
Your frame is functionally complete, but the job isn't done. Use your file to gently break all sharp edges, especially around the grip and trigger guard, for improved comfort. Sand the entire frame with 220-grit sandpaper to create a uniform surface for stippling or cerakote later. Now, perform a full function check with a complete upper parts kit and lower parts kit installed (without ammunition, in a safe direction). Verify trigger reset, safety plunger operation, and slide lock engagement. The trigger should break cleanly, and the slide should cycle freely. If you need reliable parts for this build, Polymer80Shop stocks vetted kits for models like the PF940C, PF940SC, and PF45, so you know everything is compatible.
How to finish a polymer 80 frame?
Finishing a Polymer80 frame involves precisely drilling four pin holes using the supplied jig and then milling out the rear rail cavity with a rotary tool to remove polymer tabs. The process requires specific drill bits (3mm and 4mm), a Dremel with a cutting wheel and router base, and careful, incremental material removal to ensure the metal rail modules sit perfectly flush for reliable function.
How to complete polymer 80 frame?
Completing a Polymer80 frame means installing a full lower parts kit (LPK) and pairing it with a compatible slide assembly. After finishing the frame's drilling and milling, you install the trigger mechanism, pins, slide lock, magazine catch, and rear rail module. The completed frame is then mated with a slide, barrel, and recoil spring assembly to create a functional firearm, ready for final testing and calibration.
What is a polymer 80 frame?
A Polymer80 frame is an 80% receiver, typically for Glock-pattern pistols, made from reinforced polymer. It is not a firearm as sold and requires the user to complete the final machining (drilling and milling) to install fire control components. This allows for legal home-building of a personalized handgun. Popular models include the compact PF940C, subcompact PF940SC, and full-size PF940v2.
Ready to start your build with confidence? We carry the exact frames, jigs, tools, and compatible parts kits you need to do the job right. Browse our polymer80 frames collection and find the perfect foundation for your next project.
Last updated: March 25, 2026